Click above to watch the video
See my updated and much improved version of this bench
I woke up one morning to find our kitchen table chairs GONE. My wife had had them outside in a yard sale and sold them almost immediately!
To be fair, they didn’t really fit in the space. And, she asked me to build benches to replace them before getting rid of them. But, I guess selling them was good motivation to get me to building!
Milling the Parts
I start at the miter saw and cut the 2X6 boards to about 2 inches longer than their final length. Construction-grade lumber can be very volatile and twist very easily. I pick out the straightest boards I can find and try to use them the same day.
After cutting the boards to size, I mark one face in pencil and take a few passes on the jointer. Once the pencil markings are gone I know that the entire face has been cut and the board is flat, I put that face up against the fence and use the same technique with the edge.
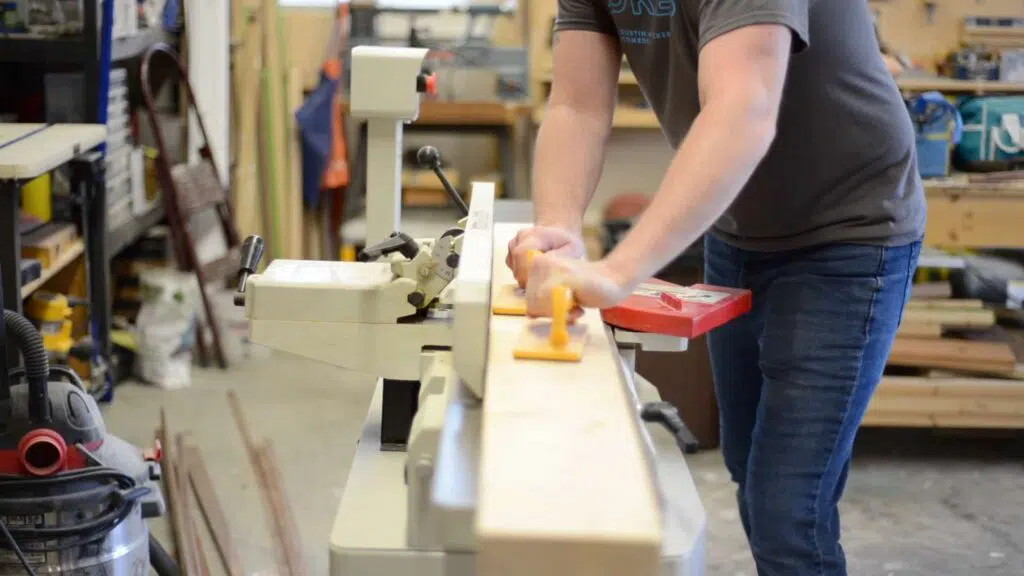
Placing the jointed face down on the table saw and the jointed edge against the fence, I trim the other edge. This gives me 2 perfectly flat sides that are parallel to each other and square to the jointed face.
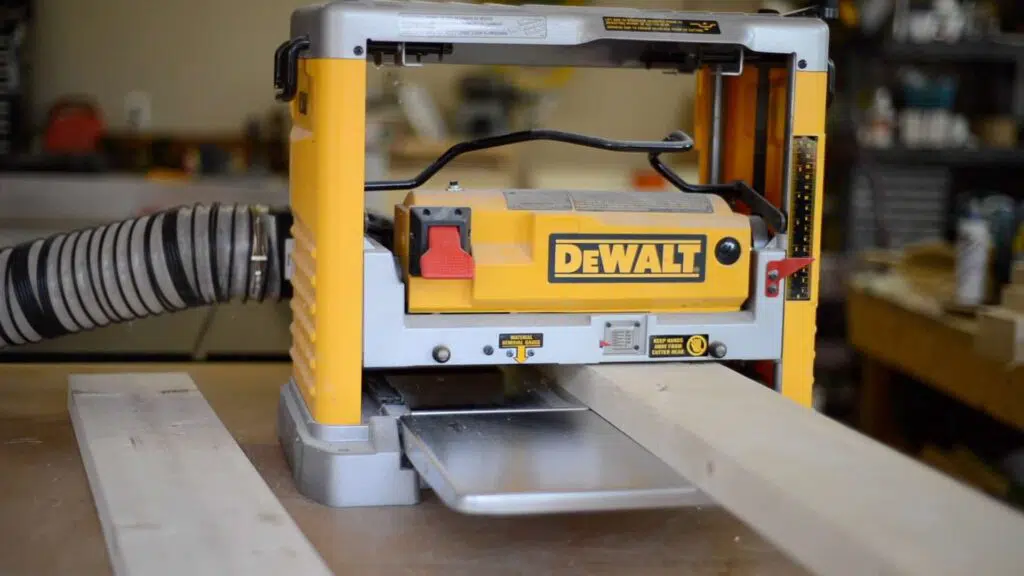
The last part of the milling process is to mark the other face with pencil, place the jointed face down on the thickness planer, and run it through. The planer cuts the top face perfectly parallel to the bottom face and thins the board.
Building the Top
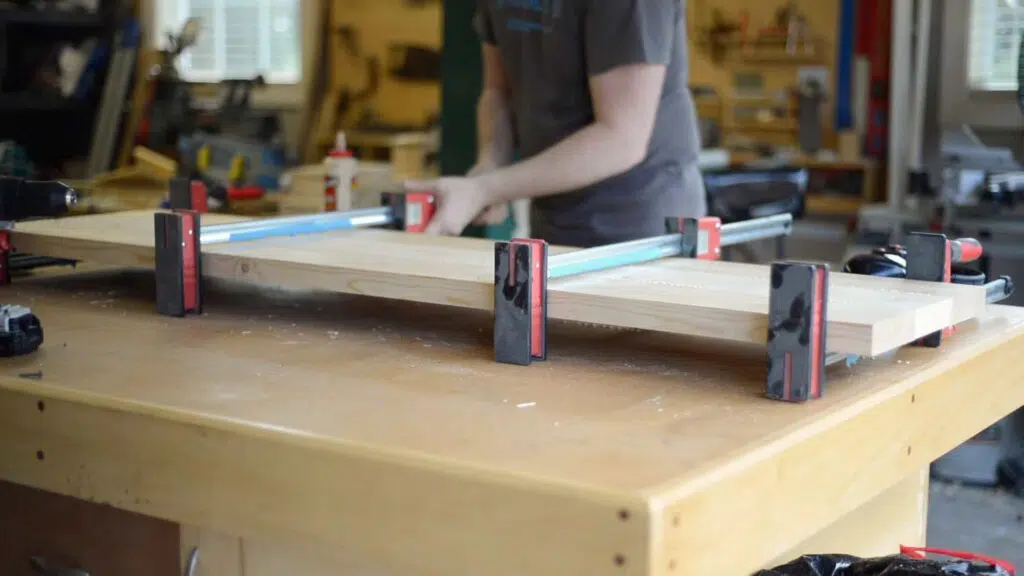
I thoroughly cover each edge that is being glued to another board and use parallel clamps to secure the laminated top. I place two parallel clamps in the upward position and two downward to try and prevent cupping.
The top gets sanded with 100 grit sandpaper on the random orbit sander and then 220 grit to finish it out.
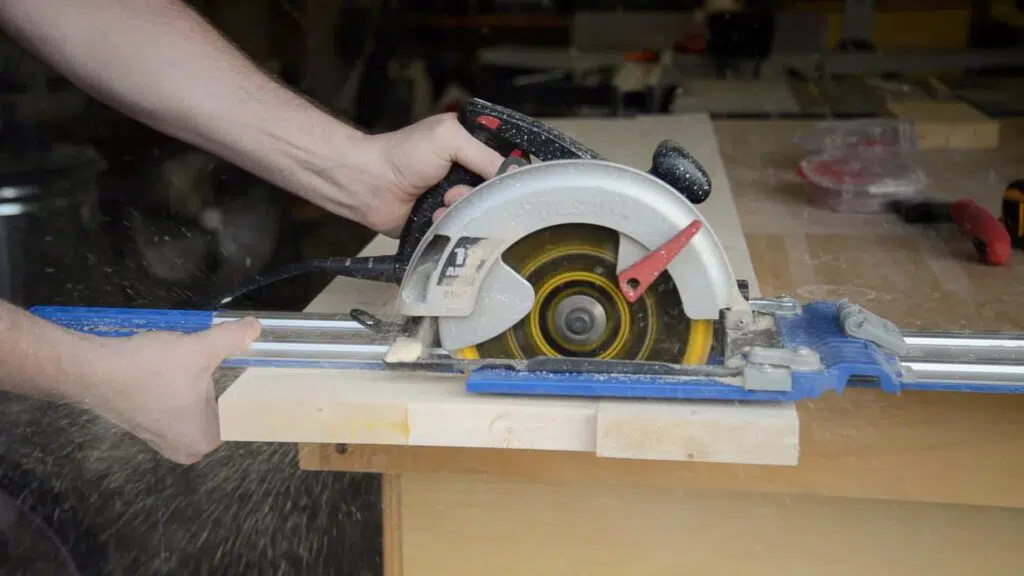
I measure for the final length allowing myself room at each end to make a clean cut.
Using the circular saw and a track saw attachment, I trim each end to length.
The edges are broken and rounded over with a block plane and sandpaper, to smooth them out.
Painting the Legs and Applying Finish
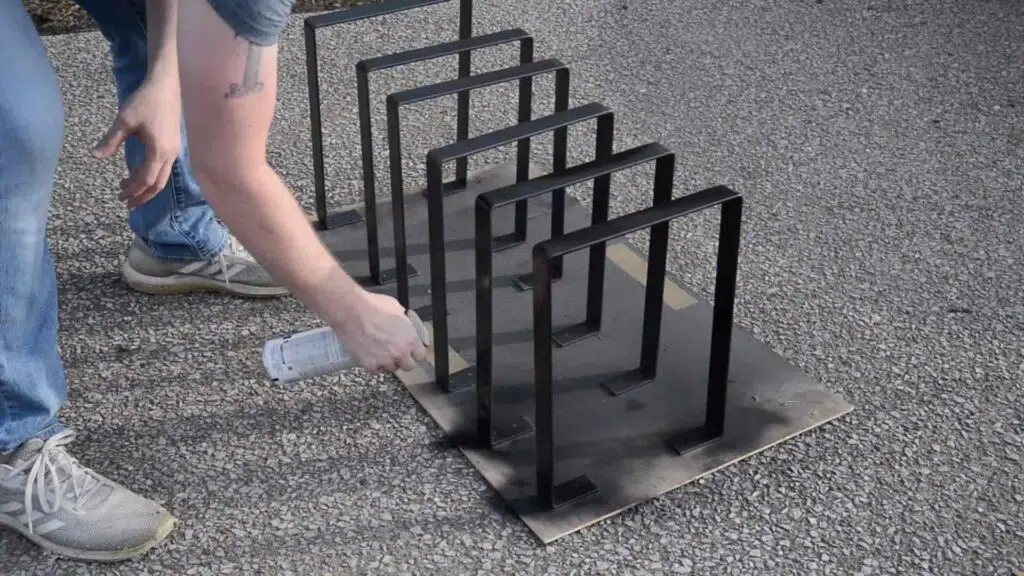
The pre-fabricated legs are cleaned with mineral spirits and given 2 coats of black paint and 4 coats of a clear coat.
After experimenting with several stains, we realize that Minwax Dark Walnut alone matched our kitchen table. I cover both sides of the tops.
Once the stain dries, I wipe them down thoroughly with a tack cloth to remove any dust and excess stain.
I use spray cans of oil-based satin polyurethane to cover only the top of each bench with a protective coat. These cans are very convenient and are easily applied in an even coat.
I take a quick pass with 220 grit sandpaper on the random orbit sander and wipe the dust clean with a tack cloth. Overall, 4 coats of polyurethane are applied, sanding in between each one.
Assembly
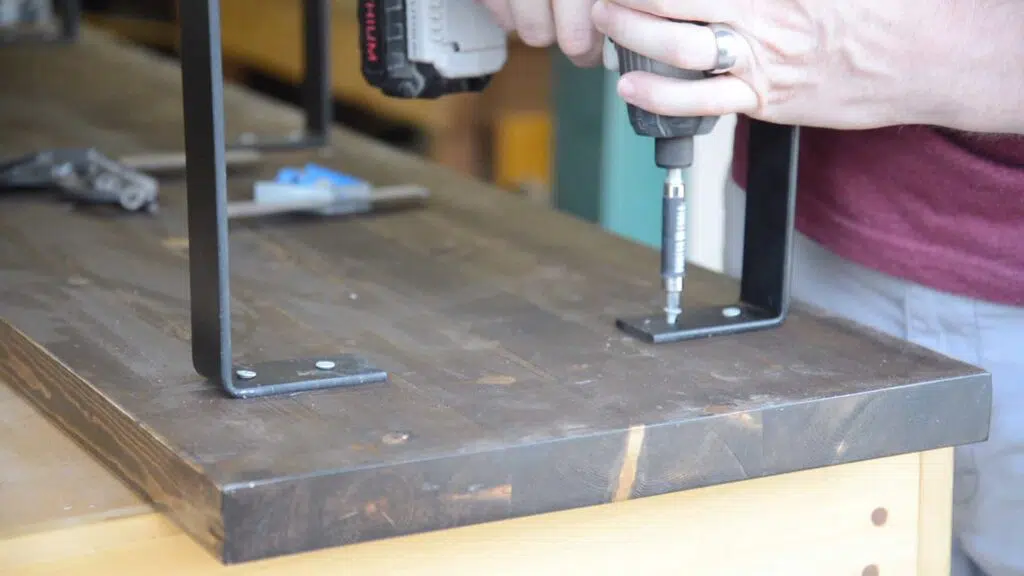
Once the topcoat has cured, the bench tops are flipped over and the legs aligned evenly with a combination square.
The legs are secured with 1 1/2” wood screws.
And, the final product! They turned out really well.
I wouldn’t recommend using the legs we bought….they work….but they’re not the best solution. They aren’t a closed rectangle so there’s a bit of movement in them. If i did this project again I would go with square tube metal legs or build them out of wood.

Get My Free Download that lists the exact tools & materials you need to create amazing projects