Click above to watch the video
I was recently asked to make some repairs to this antique wash basin stand. It has sentimental value to the owner and it was great to complete a quick project that means so much!
I started by tightening the legs and then I disassembled the top portion of the stand.
Placing the jointed face down on the table saw and the jointed edge against the fence, I trim the other edge. This gives me 2 perfectly flat sides that are parallel to each other and square to the jointed face.
The last part of the milling process is to mark the other face with pencil, place the jointed face down on the thickness planer, and run it through. The planer cuts the top face perfectly parallel to the bottom face and thins the board.
The biggest issue was a column that split and the wood insert was no longer held in. After removing it I mixed up some epoxy, added it to the inside of the column, and put the insert in place. I used a quick clamp with soft rubber feet to firmly squeeze the split end together while the epoxy dried.
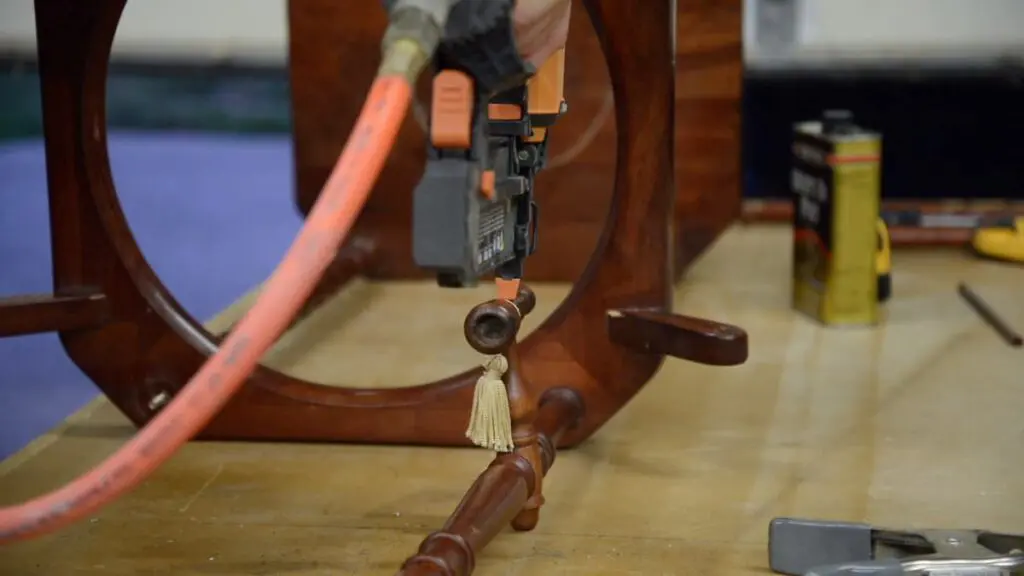
The stand had a broken wing nut, so I added a new one. One of the candle holders came loose so I removed it, sanded the edge of the tenon, and cleaned out the mortis.


I added glue inside the mortis and to the end of the tenon, and reassembled the candle holder. The candle holders were originally secured with a thin brad nail, so I do the same. At the bandsaw I cut the new towel racks from 1/4” dowel.
I sanded down the dowels and applied stain. The stain doesn’t want to stay on this oak dowel, so I soak them thoroughly and let them dry. This results in the color I want. Minwax Sedona Red ends up being a great match.
I finish the dowels with 2 coats of wipe on polyurethane. This protects them and also matches the rest of the piece.
I didn’t want to permanently attach the dowels, but I also didn’t want them to spin around inside the mortises. Hot glue is a great compromise in this situation. It secures the dowels in place, but is easily removed, if need be.

I reassembled the stand and made sure everything was aligned and tight. The last step was a good cleaning with a natural wood cleaner.
And, this piece is ready to go home!

Get My Free Download that lists the exact tools & materials you need to create amazing projects